How Plumbers Do What They Do
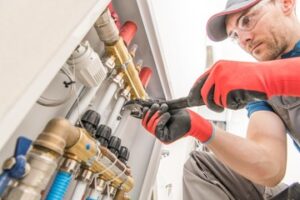
Plumbers install and repair pipes that carry water, waste, and gas throughout homes and businesses. They also work with fixtures like sinks, toilets, and bathtubs. Plumbers often use hand and power tools in tight spaces.
Plumbers sometimes collaborate with other professionals on construction sites to ensure plumbing systems integrate seamlessly into building projects. This can include interpreting blueprints and plans, ensuring compliance with plumbing codes, and inspecting work for quality.
Whether you’re planning an emergency plumbing repair or just doing some home improvement, it’s important to know how to shut off the water supply before you start working. This is a crucial skill that will save you time, money, and frustration in the long run. It’s also a good idea to make sure that everyone in your household knows where the valve is located, just in case of an emergency situation.
In most homes, the main water valve is located near where the water meter enters your house, usually in a crawl space or basement. It is usually a large valve that requires some elbow grease to operate. To turn off the water, simply rotate the handle one quarter turn in a clockwise direction.
You may need to open a faucet on a lower level of your home to allow any remaining water in the pipes to drain out. This will help prevent water from sloshing around your home and potentially flooding your house. When you are ready to turn the water back on, just rotate the valve counterclockwise to reactivate it.
If you’re unable to locate the main water valve, or if you find that it is stuck in a closed position, contact a plumber for assistance. They can typically get the valve to open within a short period of time, and they can also install easier-to-use valves that will be more convenient for future repairs.
While you’re at it, it’s a good idea to learn where the valves are for your bathroom sink, kitchen sink, laundry tub, and toilet. This will allow you to isolate the problem area and shut off the water supply for that fixture if necessary. It’s also a good idea for those who live in older homes to have their plumbers check the main water valve near their house’s foundation. This can help to prevent leaky or burst pipes from causing serious damage in the future.
Knowing how to shut off the water supply to individual fixtures is an essential plumbing skill for homeowners to have. It allows you to make minor repairs quickly and efficiently without disrupting the entire water supply for your whole house. It also helps to prevent water damage from occurring in the event of a plumbing emergency or natural disaster.
Disassemble the Faucet
Plumbing is a hands-on job that requires physical stamina. Plumbers must be able to bend, lift, and stand for long periods of time. They also need to be able to work with tools and small parts. Plumbers often must solve problems quickly and accurately. For example, they may need to determine why a faucet is leaking or find the source of a noise in a water pipe. They also need to have good analytical skills and be able to think outside the box to come up with creative solutions.
Plumbers install and repair a variety of plumbing systems in residential, commercial, and industrial settings. They use a wide range of tools to unclog pipes and drains, fix leaks, and adjust water temperature. They also inspect plumbing systems to ensure they are safe and code-compliant. In some settings, such as hospitals and factories, plumbers may install large-scale plumbing systems that serve multiple occupants.
One of the most common jobs for plumbers is to replace or repair single-lever faucets. These faucets have a lever that controls both hot and cold water flow, and they can become damaged from repeated use. To replace a single-lever faucet, the first step is to turn off the water supply. Then, you can remove the decorative cover and screws that hold the handle in place. Next, remove the faucet cartridge and replace any O-rings or seals that are worn out. Once the cartridge is replaced, you can reassemble the faucet and test it for proper operation.
Many homeowners also hire plumbers to install or replace bathroom and kitchen fixtures, including sinks, toilets, tubs, and faucets. These projects require knowledge of local building codes and regulations, as well as the ability to read blueprints and understand engineering calculations. Plumbers also often need to collaborate with construction teams and other professionals to ensure the plumbing system is installed correctly and meets all applicable standards.
A plumber’s work can be messy, and they may encounter a variety of contaminants while working on plumbing systems. For instance, plumbers who service sewage systems may encounter human waste, which can contain infectious diseases such as cholera, typhoid, and hepatitis. In addition, they may need to install or repair gas lines, which can expose them to carbon monoxide and other dangerous chemicals.
Replace the O-Ring
O-rings, little donut-shaped rubber wonders, are the unsung heroes of many mechanical systems. They play a crucial role in sealing solutions, helping to ensure the efficient operation of countless devices. However, like all components, they can fail over time. A common failure is the O-ring becoming cracked or deteriorated, leading to water leaks. This is usually caused by improper installation or exposure to the elements. The use of appropriate O-ring materials for a given application can help avoid these problems, as well as ensure the integrity of the seal. O-rings are typically manufactured in a wide range of colors, and each hue has a specific purpose. This color coding makes it easy for maintenance personnel to easily identify and replace O-rings, without having to consult detailed specifications.
Using the correct O-ring material for a particular application can prevent thermal degradation, a process that occurs when the elastomer loses its ability to absorb and release energy, resulting in a loss of compression. Additionally, proper lubrication can improve the performance of O-rings and extend their life.
Another common O-ring problem is swelling, where the ring becomes less circular due to excessive compressive force. This can be prevented by ensuring that O-rings are stored in an environment with controlled temperature and humidity. Finally, it is important to always inspect O-rings for cracking and abrasion prior to installation, as these defects may indicate the need for replacement.
To replace an O-ring on a faucet, start by shutting off the water supply valves under the sink. Remove the handle from the faucet by loosening the set screw (part #2) with an adjustable wrench or pliers, and prying off the decorative cap if needed. Next, remove the spout coupling nut and pull the spout up and out of the socket. Finally, remove the old O-rings and slip new rings on, making sure that they are an exact match in size. Once reinstalled, apply a small amount of Plumber’s grease to each O-ring to improve the ease with which they slide into place.
Once the O-rings are replaced, reinstall the handle mechanism kit and the spout in the reverse order that they were removed. Once all parts are reinstalled, turn on the water and test for leaks.
Replace the Seat Washer
In most faucets, the washer that sits on the top of the valve seat keeps it from slipping or breaking down. When the washer becomes worn or stretched, it will no longer keep a tight seal on the valve seat and it will begin to leak. This is a simple part to replace and can often fix the leak, saving you money by avoiding a costly faucet replacement.
Examine the seat washer to see if it is damaged or disintegrating; if so, it needs to be replaced. It should have a square or hexagonal hole in the middle and slotted for a screwdriver; if not, it is usually a flat washer that will not need to be replaced. Look inside the faucet body to determine if the valve seat has grooves or scratches on it; if so, it will need to be resurfaced using a special seat-dressing tool.
Once the new seat washer is in place, replace the screw that holds it in place (again, use penetrating oil if necessary) and reassemble the faucet. Be sure to reinstall the packing nut, then turn the water back on and double check for leaks.
If changing the O-ring and the seat washer does not fix the leak, it may be a problem with the valve seat itself. This will require a special valve-seat grinder, which is not expensive, to grind down the surface of the valve seat and reseal it. Be sure to wear a mask when performing this operation! If the problem persists, it may be time to call in a plumber.